• Training
    • Injury Prevention
    • Training Tips
  • How To
    • Bike Fit
    • Gear
  • Nutrition
    • Nutrition Tips
    • Weight Loss
  • Repair
  • Reviews
  • Stories
    • Funny Stories
    • Jokes
    • Quotes
    • Videos
    • Funny Videos

I Love Bicycling

I Love Bicycling is a website that is geared towards cycling for beginners with road cycling tips, training articles, nutrition tips, weight loss, how to’s and bike repair articles.

Repair

Must Know Simple Fixes on your Bike

August 27, 2015 by Adam Farabaugh

Your bike is a finely tuned piece of machinery that allows you to travel at great speed and distances all under your own power.  Compared to a motor vehicle there are not very many parts and each one has a specific job.  Without almost any one of them, your bike will not work.  The good thing with a bike is that they are relatively easy to work on and fix, provided you have a few tools and a little know how.

Knowing these few simple fixes and how-to’s will get you out of the majority of breakdowns.  Practice them before you need to perform them on the side of the road in a cold, wet rainstorm.

Must know simple fixes on your bike

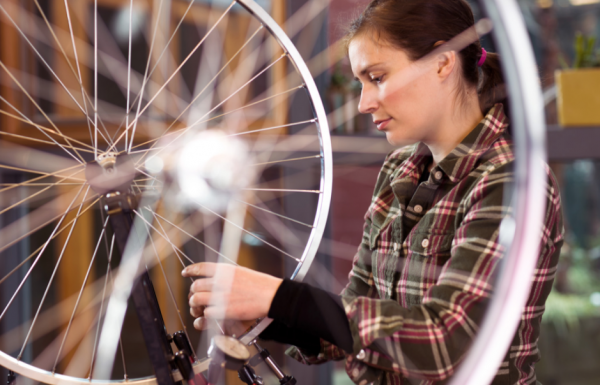
Taking the Wheels On and Off

You may never have had to before, but knowing how to take your wheels on and off will not only allow you to change a flat tire if the need arises, but also if you need to take them off to place them in your vehicle.  Most bikes have a “quick-release” skewer that holds the wheel in place through the axel.  If your bike has “nuts” on the end of the axel you will need two Metric wrenches of the same size.  Typically 15mm. Otherwise you need to open the lever on the quick release to loosen its grip on the frame.  Sometimes this will open the skewer enough and you can slide the wheel out.  If it is still too tight, the opposing side of the skewer is just a threaded nut.  Turn it counter-clockwise to loosen it.

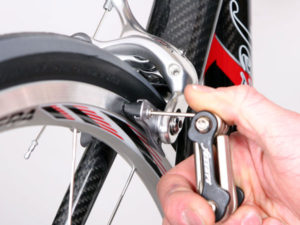
On most bikes you are going to have to open up the brake in order for the tire to fit through the brake.  On road bikes, this is done by flipping the little lever up which will loosen the cable tension.  On other, more recreational, rimmed braked mountain or cyclocross bikes, you will have to disengage the “L” shaped noodle that holds the brake cable to the brake.  You do not need any tools to do this so don’t loosen any bolts.  Your brake may still be a bit different so learn and understand how your brake works to open and close it safely.

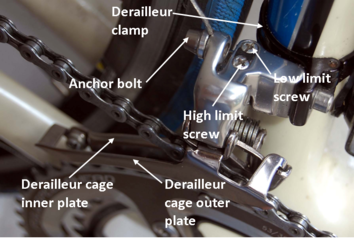
Once this is done you can easily pull the front or rear wheel down and out of the frame.  For the back wheel you are going to have to move the derailleur (device that changes the gears) down and out of the way to give enough space for the wheel to exit the frame.  Putting the bike in its hardest gear (gear you would go downhill on) will make this easier.

Now that the wheel is off, you need to put it back on.  Make sure both sides of the axel are in the hooks on the frame for the axel.  The best way to do this is to have the wheel sitting on the ground, vertical, and set the bike over top of the wheel onto the axel.  Once in place you can then push the quick-release lever into its closed position.  It should become firm half-way and then snug when it is pressed down all the way.  If it is too tight or lose you need to tighten or loosen the nut on the opposing side.  (counter-clockwise if it’s too tight, clock-wise if it’s too loose)

Once the wheel is tight in the frame reattach the brakes as they were prior.  Lift the bike and spin the wheel and test the brakes to make sure they are working properly as well as to ensure that the wheel is installed properly and will not fall out.

Fixing a Flat

Another important fix that will be hugely beneficial when it’s raining and cold on the side of the road is knowing how to fix a flat tire.  You first need to remove the wheel (that is flat) by following the instructions above.  Once you have the wheel off you need to take your tire levers (item number one that is needed) and hook one underneath the side of the tire to pull it back over the rim.  You only need to do this on one side.  Expose the inner tube all the way around and then pull out the inner tube with your hands.  You will need to push the valve through the hole in the rim to take the tube completely out.

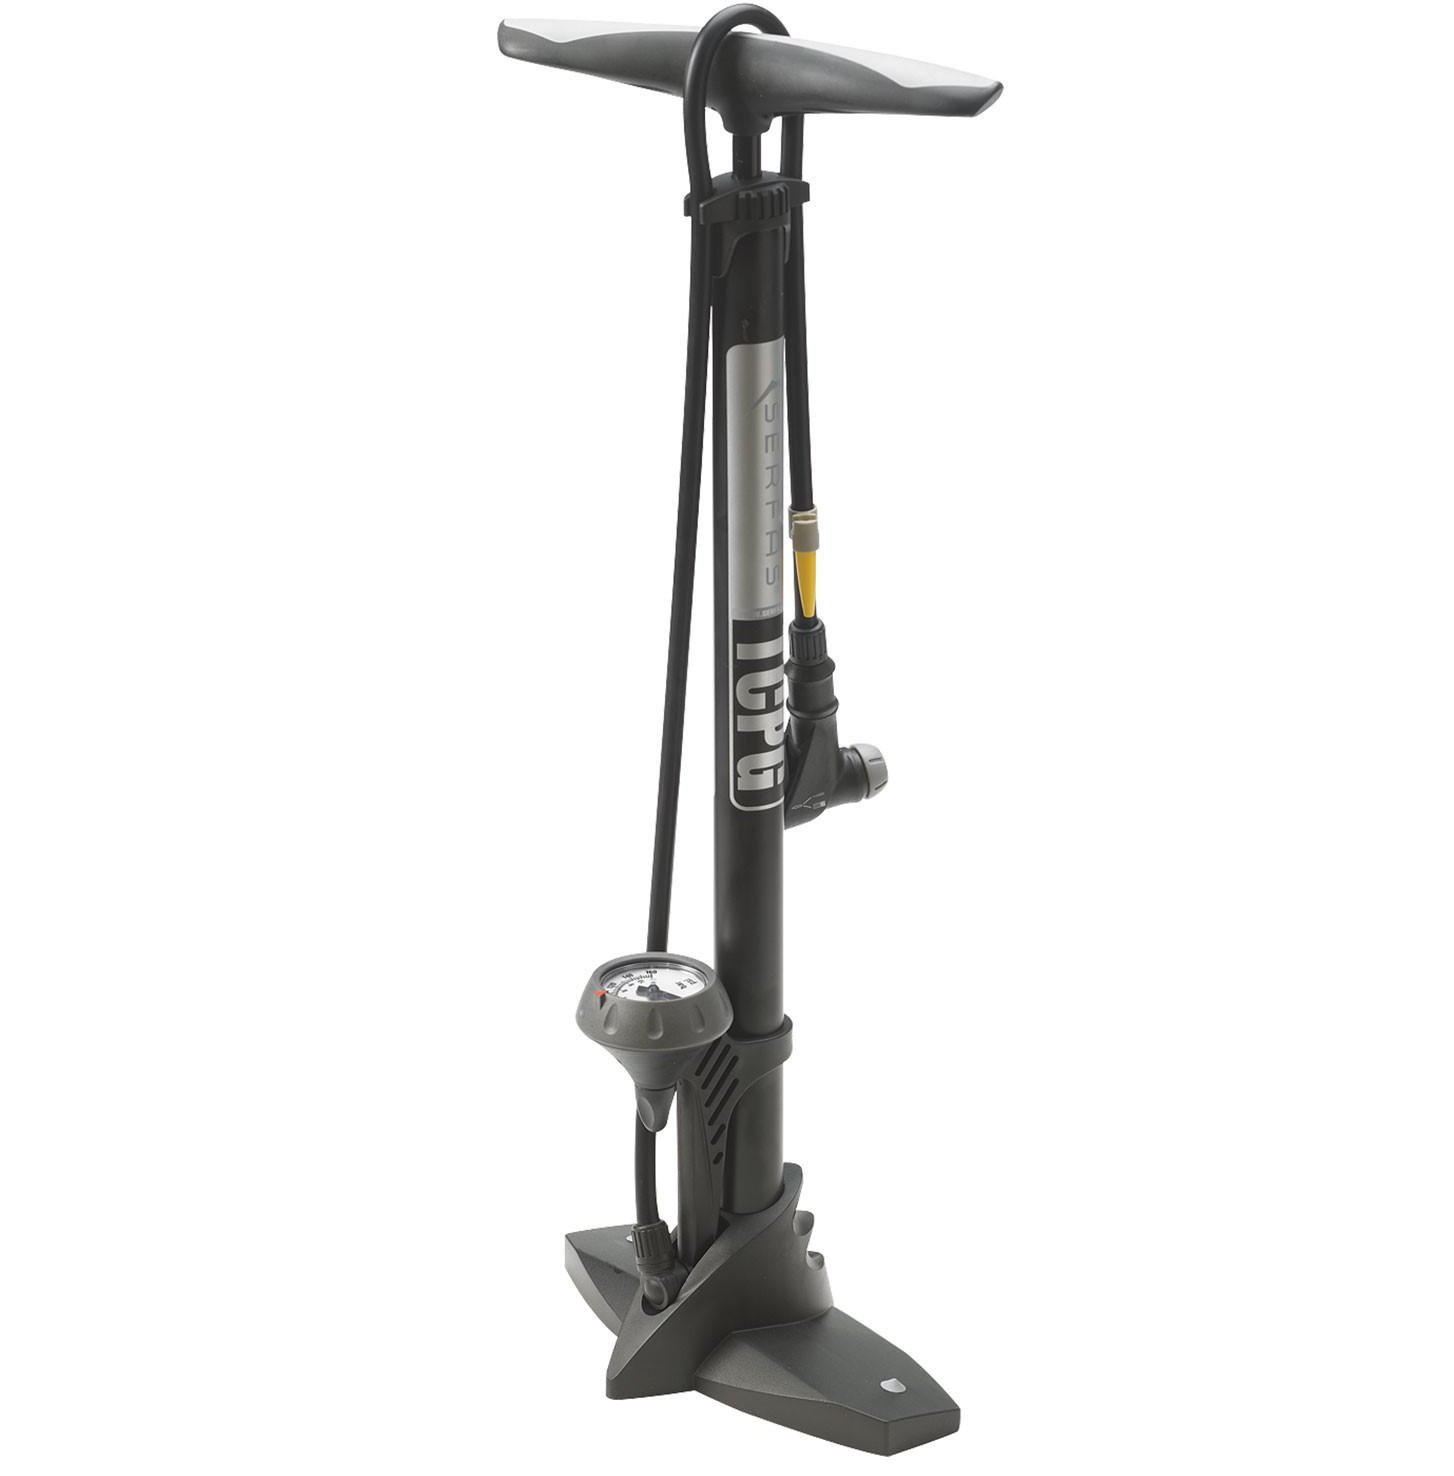
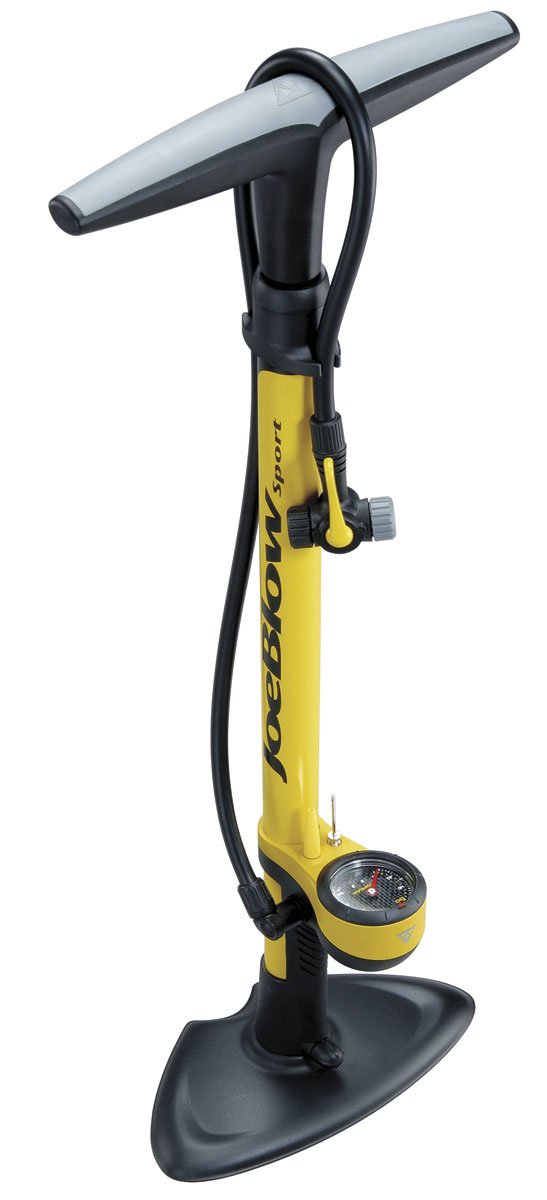
Now take your hand pump (item number two that is needed) and pump up the tire to determine where the hole is.  Once you have found it, find that same place on the inside of the tire and make sure there is no glass or any other debris in there that can cause the new tube to go flat again.  If the tube has “snake-eyes” or a pinch flat, there’s no need to do this as the flat was caused by too low of air pressure and the tube was pinched causing it to flat.

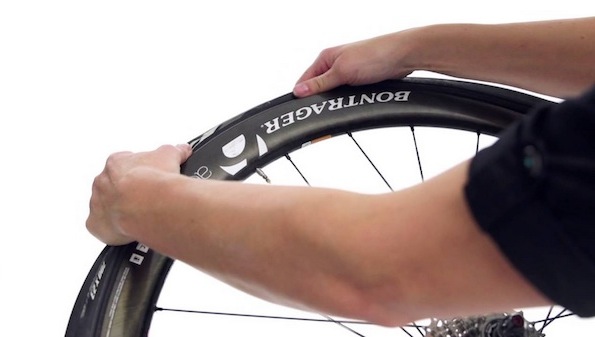
Once you are sure that there is no glass or anything still in the tire, place the new tube in the tire.  First though, put a little bit of air in the tire to make it easier to work with.  Then place the valve through the hole in the rim and then work the rest of the tube into the tire all the way around.  Once the tube is completely inside the tire, start at the valve stem and press the tire back inside the rim.  This works best with your thumbs.  Now work your way all the way around until you get to the last few inches.  Now make sure the tube is still pressed all the way up into the tire.

This last part is the most difficult.  You need to push the remaining bit of tire onto the rim except it is going to be tight.  You may be able to do it with your thumbs but you may need a tire lever again.  If you can’t get it on with your thumbs, or by grabbing the other side of the wheel and rolling it over with your palms, then place the tire lever on the inside of the rim, making sure the tube is not pinched between the lever and the rim.  Then “lever” the tire up and over the rim into place.  This will take some trial and error and some time so practicing ahead of time will be beneficial.  Once the tire is on, and before inflating, work your way around the tire on both sides of the rim and make sure that you can’t see the tube anywhere.  It should be pushed up inside the tire out of site.  Once you are sure of this you can then inflate the tire with your hand pump.  Try and get it to your original pressure but this may be difficult with a hand pump.  Get as much in as you can as this will help prevent any additional flats.  Put your wheel back on, make sure your brakes are working properly, test them both, and off you go.

Making Sure the Bolts are Tight

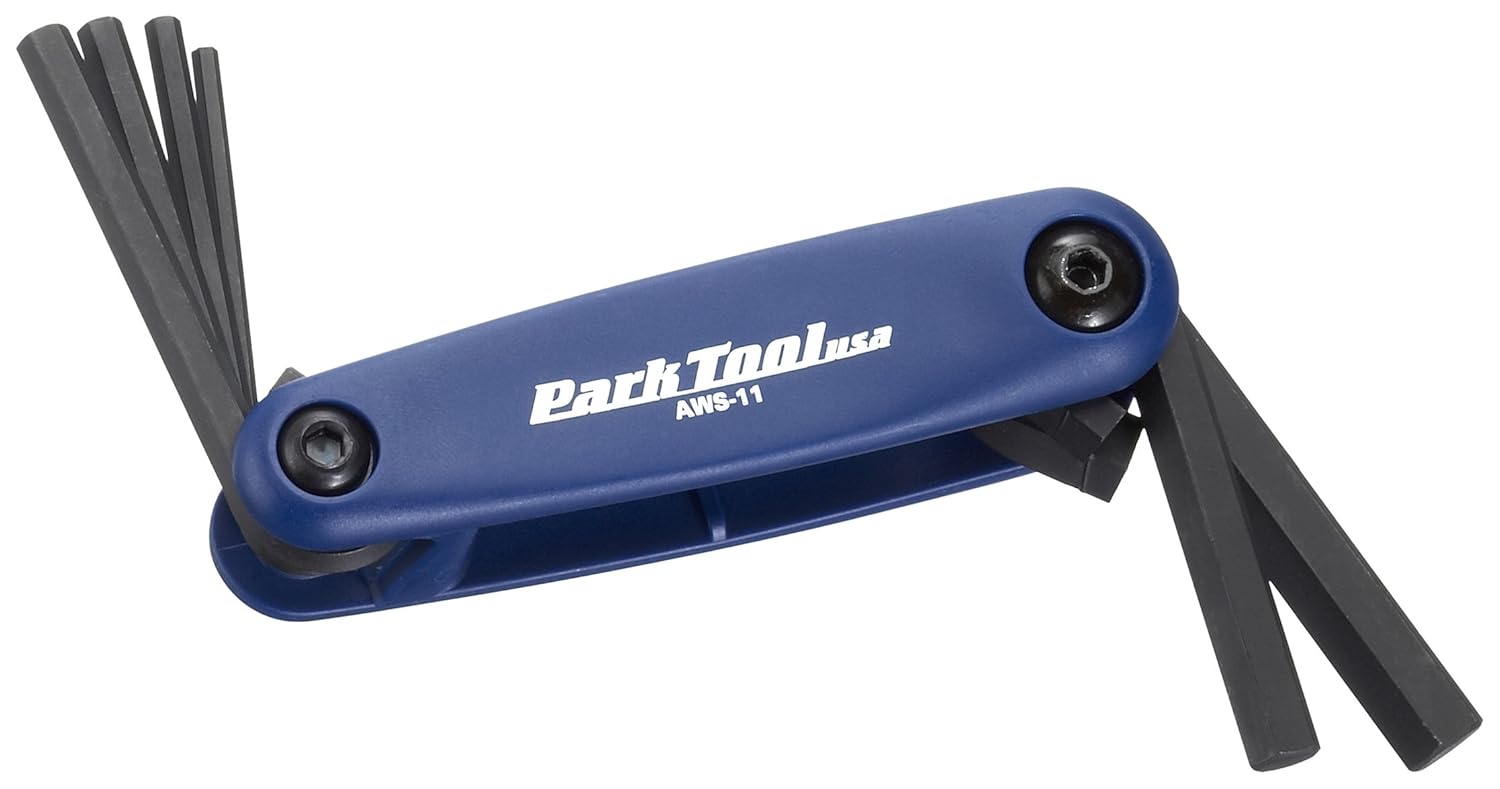
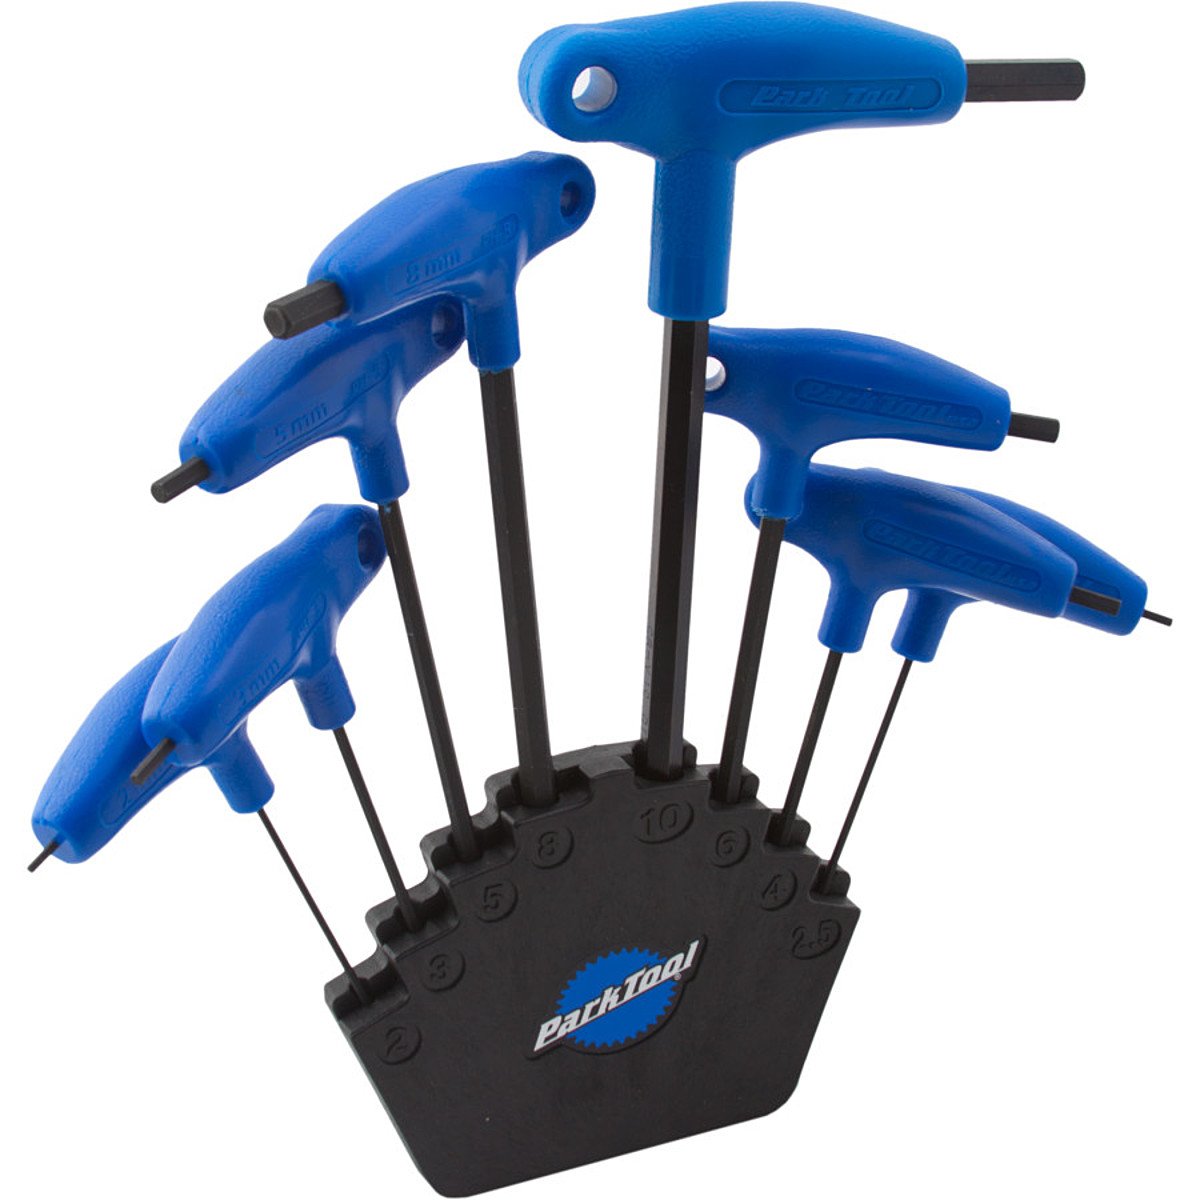
Safety is priority number one when riding.  Checking to make sure everything is tight and ready to ride should be done frequently, especially if it’s been a while since the bike was ridden.  Take a Metric allen key (pretty much all bikes use Metric bolts so you must use Metric wrenches otherwise you risk stripping the bolts) and check and make sure the bolts holding the handle bar on are tight.  Then make sure the bolts holding the stem (the part that connects the handle bars to the bike) are also tight.  They should be hand tight.  Don’t over tighten them as that can be just as bad as under tightening them.

The next bolts to check are the bolts holding the brakes to the frame.  There are many different styles of brakes but you can look and figure out how it connects to the frame.  Most have an allen bolt on the backside of the frame from the brake.  Then make sure the bolt holding the brake cable is tight.  If this bolt is loose, when you engage the brakes the cable will slip and you won’t have any brakes.  Make sure this is properly tightened.

The last important bolt, or sometimes quick-release, to make sure is tight is the seat post clamp.  This is the bolt that tightens down on your seat post ensuring that it doesn’t slide down when you sit on it.  If it is a quick release, refer to the above piece about removing a wheel as it’s the same style quick-release as your wheel axel.

Knowing how to do these few simple things on your bike will help you in a lot of ways as well as save you money at the bike shop.  If you don’t know or are not completely sure if you did something right, take the bike to your local bike shop and they will make sure that it is done properly and that the bike is safe.  Riding a bike can be extremely dangerous and having a malfunctioning bike can be catastrophic so take the necessary steps to ensure that it is a safe machine to ride.  Once you get good at these simple fixes on your bike you’ll be able to get out of most situations thrown at you while out on the road.

Breakdown on the Blacktop – Common Bike Repairs

August 18, 2015 by Wade Shaddy

bike repairs
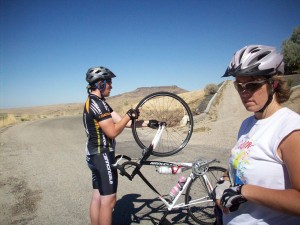
You’re miles from nowhere. It’s hot. You’re low on water, and there’s no cell service. It happens with a loud bang, a clattering, dead silence, or it feels like you hit a patch of ice. You lose speed, and roll to a stop. An empty feeling settles in your gut — nobody’s going to rescue you. Do you have the means to deal with break-downs on the blacktop?

Common Bike Repairs

Contemporary bikes are one of the most reliable machines out there. But they have an Achilles heel in the form of tires, chains and cables — the three most common issues. Other parts, such as the seatpost, derailleur, stem or handlebars fail less often. If you’re prepared for any of these maladies, then you will be able to get rolling again in no time, no matter how far from home.

Blowout Repair

The blowout is the most common bike breadown, and most cyclists don’t carry spare tires. Tubes are one thing, and most everyone has a couple of them in their under seat pack. A tube alone isn’t going to patch a gaping hole, but there are a couple options to get rolling again.

common bike repairs, blowout bike repair

The Million Dollar Solution

Remove the wheel from the bike. Fold a dollar bill into thirds and tuck it between a new tube and the gaping hole in the tire. Pump the tire up to about 20-30 lbs. It sounds hillbilly, but it’s saved more cyclists from walking than you can possibly imagine.

tire bike repair

Boot It

Before you leave home on your next ride, cut a few pieces of thin leather into oval-shaped discs about 2-inches wide, and 3-inches long. Slip one between the new tube and gaping hole. Leather boots hold up even better than dollars.

Breaker Breaker

Chains are hundreds of small pins, connected by pieces of thin metal, under tremendous stress. It’s a miracle they don’t break more often. But when they do, you’re dead on the blacktop. Never leave home without tools to fix your chain. The chain breaker tool and master-link, are two items you should never leave home without.

Chain Breaker

The chain breaker is a small hand-operated miracle. Without it, your chain is worthless if it’s broke. A chain breaker allows you to remove or add links to your chain. It might seem difficult to use at first. Practice removing and replacing pins at home on a spare chain, until you’ve mastered the device. You’ll thank yourself later when you’re crouched alongside a hot highway.

chain bike repairs, chain repair

Missing Link

Use a master link in conjunction with a chain breaker to repair broken chains. Every bike shop carries them. Sometimes referred to as a Missing link or Power link, pick up a couple that match the size of your chain in millimeters. Grab some different sizes if you like, and you can repair almost any chain, for anyone, and you’ll be a hero on the next group ride.

bike repairs, bike repair

How to Use Master Links

Shift the bike into it’s lowest gear, and thread the broken chain through the derailleur. Use the chain breaker to remove the remaining broken links so that you have opposing holes on both sides of the chain. Unwrap the Master, Power, or Missing link from it’s packaging. Insert the missing link through the open holes, and snap it together. Get on the bike, and push on the pedals to engage the link, and get riding again.

bike repairs, chain repairs

Broken Cables

Broken cables are common, but they rarely leave you stranded. If you’re an experienced mechanic, you can replace it with a new one, but that takes time and most cyclists aren’t mechanics. The best solution is to just ride the bike — but there are options.

Front Derailleur Cable

If you break your front cable, your bike will automatically shift into the little ring on the front. Leave it there and just ride — you still have your back gears. You’ll be experiencing a situation known as cross-chaining. It might clatter, but won’t cause any permanent damage if you only ride it home.

Rear Derailleur Cable

If you break your rear derailleur cable, the bike shifts into the highest gear and stays there. If you can’t, or don’t want to ride in high gear all the way home, it’s possible to put the bike in a different gear — but it will stay in that gear for the duration of your ride. Pull the broken cable out of the shifter. Pull the cable tight with your hand, and allow the bike to shift into a gear of your choice. Tie a knot in the cable, and use zip-ties and tape to secure the cable to the bikes frame anywhere it’s convenient.

Option Two

Remove the cable from the derailleur. Twist the high-limiter screw on the derailleur clockwise to tighten it, shifting the bike into a higher gear. Typically one or two gears is all you get.

Derailleur Repair

Derailleurs are mostly reliable. If you bend one, bend it back with your fingers. The part that typically fails is the jockey wheel — the little ceramic gear on the bottom. Keep a couple spare hex wrenches handy, if the gear comes loose, it’s usually the axle of the jockey wheel. Insert a hex wrench through the center to serve as the axle. If you don’t have a hex wrench, a stiff piece of wire works too.

Handlebars and Stem Repair

If your handelbars or stem loosen, it’s typically because you’ve lost a bolt somewhere along the ride. Keep some spare 4 or 5-mm bolts in your underseat pack. If you don’t have spares, borrow one from somewhere else on the bike. Water bottle cage bolts are good candidates for borrowing.

Seatpost and Seat Repair

Getting shot out of the saddle sucks. But seatposts break all the time. If you break a seatpost, remove the broken off piece from the frame, and reinsert the shortened seat post and seat. It might be short, but will get you home. If the broken ends are frayed, twisted or bent, use the asphalt surface of the road or a rock to sand the end smooth again, so it will fit into the seatpost clamp.

Seatpost Clamp Repair

The seatpost clamp is another item that fails regularly. The feeling of breaking a seatpost clamp is like none-other. It feels like your bike is on ice, and you’re going down. It’s impossible to fix it without replacement. Keep some zip-ties in your underseat pack. Use them to secure the seat and clamp together just long enough to ride back home.

Find the 20 essential bike repair tools every cyclist should own to fix any breakdown.

10 Quick Bike Repairs for Common Problems

May 22, 2014 by U.M.

10 Quick Bike Repairs for Common Problems

10 quick bike repairs for common problems
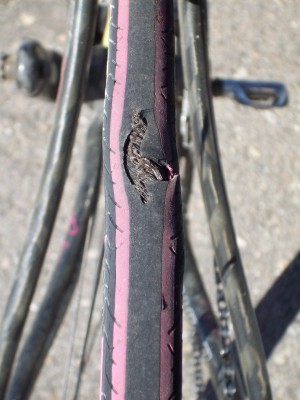
Bike repairs are an inevitable part of life if you’re a regular cyclist. Some repairs can be costly and time-consuming, but not all problems require a trip to the shop. Here are ten common bicycle troubles that you can fix yourself with a few tools and some good know-how. [Read more…]

5 minute DIY Bike Maintenance

February 24, 2014 by U.M.

bike knowledge to beard ratio - DIY bike repairNo matter what kind of bike you ride you will eventually have to give that bike some sort of maintenance. This keeps the bike in good working condition for longer no matter how often you use it. This maintenance is just small upkeep and repairs that you can do at home in minutes. Here are a couple of quick DIY bike maintenance tips: [Read more…]

How To Adjust Rear Derailleur

December 29, 2013 by Lee Agur

How To Adjust Rear Derailleur

Having problems with your rear derailleur? Watch this short video to learn how to keep it shifting smoothly.

how to adjust rear derailleur

How To Adjust Front Derailleur

December 29, 2013 by Lee Agur

How To Adjust Front Derailleur

Having problems with your front derailleur? Watch this short video to learn how to keep it shifting smoothly.

how to adjust front derailleur

How To Clean a Bike

December 29, 2013 by Lee Agur

How To Clean a Bike

All to often people skip the all important apres bike clean… this can decrease the life span of your components quite significantly. Learn how to clean a bike properly in this 15 minute video.

I hose my bike down before cleaning the chain (unlike the video) but… it probably doesn’t matter that much.

how to clean a bike


Carbon Fiber vs Aluminum vs Steel vs Titanium

December 10, 2013 by Lee Agur

Carbon Fiber vs Aluminum vs Steel vs Titanium

What is the real difference between carbon fiber vs aluminum vs steel vs titanium… What are the Pros and Cons of each material?

Carbon Fiber

Carbon Fiber vs Aluminum vs Steel vs Titanium BikeMost high-end bikes are made from this material and for good reason:

Pros

  • Lightest material
  • Strongest material
  • Stiffest material
  • Best shock absorption
  • Infinitely mouldable to any design
  • Flexible where it needs to be
  • Won’t rust or corrode like steel

Cons

  • Expensive
  • Not all carbon is created equal
  • Can crack/fracture
  • Strength and stiffness depend on design

Aluminum

Many entry level bikes are made from aluminum because it can be made stiff and light enough for a great ride.

Pros

  • Light
  • Strong
  • Stiff
  • Mouldable
  • Great for climbing and sprinting
  • Won’t rust or corrode
  • Less expensive than carbon fiber

Cons

  • Harsh on rough roads
  • Can fatigue over time (Leads to overbuilding which adds to weight)
  • Not easily repaired
  • Weak joints

Steel

Steel will last a life time. It is also the easiest to repair, making it a great bike for touring.

Pros

  • Inexpensive
  • Strong
  • Flexes enough for a soft ride
  • Most durable of all the materials
  • Lively feel
  • Easy to work with and repair

Cons

  • Heavy
  • Rust/corrosion
  • Flexes too much for racing

Titanium

Titanium is a metal that takes aspects from aluminum and steel… better shock absorption that aluminum but not quite as light.

Pros

  • Bullet proof
  • Its density is between that of steel and aluminum which makes it stiff but shock absorbing
  • Lively feel
  • Shock absorbing
  • Does not corrode

Cons

  • Expensive
  • Difficult to make aero shapes due to welding considerations
  • Difficult to repair
  • Stiffness is traded for lightweight

My Preferences…

Carbon Fiber vs Aluminum vs Steel vs Titanium BikeI have at least one bike made out of every material. I use carbon fiber bikes the most; but here are the exceptions:

Winter riding – I use an aluminum frame as I do not want to ruin my more expensive carbon fiber frames, but still want a bike that climbs fast.

Downhill Mountain Bike – I like my titanium frame. I feel indestructible going downhill.

Touring – I would use a steel frame due to the ease of repairs and dependability.

I realize not everyone is fortunate enough to have such a wide selection of bikes and price point is always a factor. If you are just getting into cycling then most of the time a carbon fiber frame is not necessary. My first bike was aluminum and it was fantastic. I still have it… and I still ride it.

Each material has different qualities keep them in mind when you go to purchase your next ride.


Should I Buy a Bike Online?

November 12, 2013 by Lee Agur

Buy a bike online
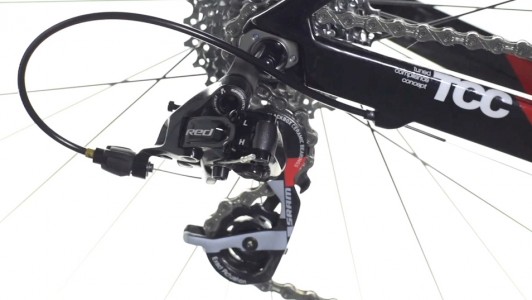
The answer is simple… it is no, maybe and yes! It really just depends on who you are.

I have had numerous people asking me over the last month, “Should I Buy a Bike Online?” People see great online prices from places like Jenson, Wiggle and even Amazon then they compare them to the local bike shop prices and start to wonder why they would buy from the local bike shop.

Should a Beginner Cyclist Buy a Bike Online?

A beginner road cyclist should almost never buy their bike online. As a beginner you are unable to tell how uncomfortable a bike is by looking at it online. No matter how much you saved on the bike by buying it online it is not worth it if it does not fit or is uncomfortable.

My friend bought a bike online and saved almost $500, he was so impressed with himself. $600 later (new bike parts to try to make the bike fit) the bike still does not fit, he still has something that is not ideal for him but has too much money in the dud to change it out and buy a new one. Huge mistake.

The local bike shops let you test ride their demo bikes and will exchange parts of equal value for free until it fits properly. You cannot put a price on that service or the comfort around your crotch. A local bike shop will probably also give you some free tune ups for the first few months.

So my advice to any new cyclist is to go to your local bike shop, test out multiple rides and ask for their advice on what you need. Establish a relationship with the local bike shop, they have a wealth of information.

Should Experienced Cyclists Buy a Bike Online?

Experienced cyclists often are in the market for a specific bike and are aware of the geometry, style, price etc. of the bike. Sometimes the local bike shop won’t even have that bike in for several months (if at all). So it is often ok for an experienced cyclist to purchase a bike online. It is not without its pitfalls though.

I have purchased 5 bikes from the local bike shop and 5 online. All 5 of the bikes I bought form the local bike shop fit like a dream and cradled my nether regions as if they were gold. The 5 bikes I have bought online… only 2 of them needed minor adjustments… the other 3 cost more than I like to admit.

Where to Buy a Bike Online?

Jenson, Wiggle, Ebay, Craigslist, Amazon… there are so many sites…

Moral of the Story

Moral of the story… try to purchase from your local bike shop… especially if the prices are even somewhat comparable because you don’t know what those hidden costs may be in order to make the bike fit properly.

20 Essential Bike Repair Tools

October 11, 2013 by Lee Agur

Essential bike repair tools
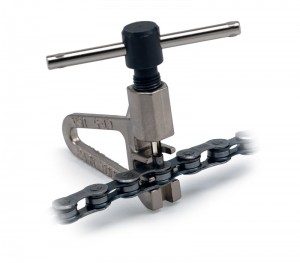
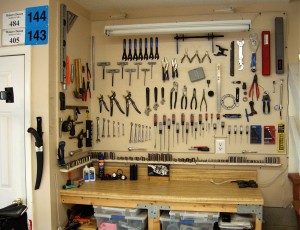
You do not need a lot of bike repair tools, but you do need the right ones.

You do not want to be forced to go to your local bike shop every time there is a little squeak or creak. Getting the essential bike repair tools can save you time and money. Time? Yes time, unless you are lucky enough to have a mobile bike shop like Velofix in your town, then you have to drop off and pick up your bike. I have 5 bikes and one small car… you do the math… it is frustrating.

To be honest, I like going to the local bike shop to catch up and see what is going on, but not for small bike repair maintenance issues. If you have a real problem leave it for the professionals.

Before we even get to the tools, you have to know how to do the repairs. This 101 Bike Repair and Maintenance Tips article is sure to have the info on what you need to get rolling. And if you’re looking for a hard-copy book or videos, I highly recommend Dave Delgado’s bike repair book & videos. I personally prefer watching a very short clip than reading through a bike repair book and trying to figure it out from the pictures. All the videos are short and to the point!

Ok… on to the tools…

20 Essential bike repair tools

Note: Click on the images to compare prices and read reviews.

1. Bike Repair Stand

Have you ever tried to work on a bike without a bike stand? That is the way I used to work on bikes, not recommended…

RAD Cycle Products Pro Bicycle Adjustable Repair Stand
Park Tool Repair Stand

Recommendation: You can get the economy one at amazon as well. The one thing I do not like about the RAD Cycle Products Stand is that the legs are large and there are 4 of them… might be in your way. (I love park tools)

2. Bike Pump

Well… I think we all know what this does… but… you do want to make sure that the bike pump works on both presta and schrader valves… all of these do.

Recommendation: To be honest I have never really found a difference in bike pumps… Get a cheaper one… their air is just as good, I promise.

 3. Hex Wrenches

Want to adjust something? Hex wrenches are an integral part of bike repair. You will use these quite often and I suggest the P wrenches and not the inexpensive all in one.

Recommendation: Using the inexpensive set is very annoying but it is good if you’re traveling.

 4.  Cable Cutters

Cable cutters for your cable housing and cables.

5. Electrical Tape

The duct tape of the cycling world! How I Love you!

Recommendation: Go support your local department store next time you are there. Electrical tape is everywhere.

6. Chain Tool

Did you break your chain? Need to take a link out?.

-Expensive
-Inexpensive

Recommendation: Just get a multitool that has one in it (below)

 7. Chain Lube

Everyone likes a lubed chain.

bike repair tools

8. Screwdrivers

To adjust derailleur stops and other jobs.

9. Tire Levers

Need to change a flat? Put your race tires on?

bike repair tools

Bike Repair Tools10. Hammer

Everyone needs to give their bike a little love tap once in a while. Just make sure it is a soft one… you don’t want to hurt your baby.

Park Tool Shop Hammer

Recommendation: Having a hammer with a rubber end is a good idea!

11. Scissors

Want to open that brand new package? Cut some Zip ties? Cut the handle bar tape?

Recommendation: Pick up from your local department store.

12. Adjustable wrench

Need to take those fenders off?

bike repair tools

Recommendation: Pick up from your local department store.

13. Gear brush

A clean bike is a fast bike! You can actually lose power if there is buildup in your chain and rings. Keep it squeaky clean.

14. Grease

Metal on metal? Grease it up… I didn’t put grease on the pedals with my first bike… never going to come off… I will have to buy a new crank arm just to replace the pedals. Whoops.

bike repair tools

15. Multitool

Do not leave home without it! I have made that mistake a few times… unfortunately walking home is much slower than biking!

bike repair tools        bike repair tools – Fully Loaded

Recommendation: If you don’t mind a little extra weight go with the Amazon fully loaded option – it is the Topeak Alien II 26-Function Bicycle Tool. The reason you have a multitool is to be prepared for anything… this bike repair tool will do that.

16. Minipump

A phone does not pump up your tires! It is still amazing how many people do not bring a pump on a ride. All it takes is once… especially if you are out of cell service!

         bike repair tools          bike repair tools

Recommendation: C02 or non-C02? I use both! I have a C02 for my road bike because it is much faster than a hand pump (races etc.). I use a hand pump for my mountain bike because they are more reliable.

17. Chain whip

Chain whips are used to replace cassettes.

bike repair tools

Recommendation: No need to get an expensive chain whip, it is unlikely you will use it too often.

18. Lock Ring Tool

You use the lock ring tool in combination with the chain whip to take the cassette off.

bike repair tools

Recommendation: It is easier to use a lock ring tool with a guiding pin.

19. Spoke Wrenches

bike repair tools

20. Beer! Just me?

Essential Bike Repair Tools

Not an essential bike repair tool for everyone? Personal preference I guess.

Bonus

If you are just getting started and do not have any of the items it is better to start off with purchasing a whole kit like these ones:

Park Tool AK-38 Advanced Mechanic Kit from Amazon
Starter tool kit from Amazon

Bike repair tool kits are a great way to start. It is a large upfront investment that will save you money in the future.

There are many other tools that are helpful i.e.. Permanent marker, paper, measuring tape, zip ties to name a few, but the above list should get you started and then you can continue to add items on an as needed basis.

Bike maintenance can be very rewarding. I hope you are able to learn and enjoy it.

« Previous Page
  • Facebook
  • Tumblr
  • Twitter

Latest Articles

JOIN Cycling: A New Training Platform for Cyclists

May 27, 2024 By Eric Lister

cold exposure

The Benefits of Cold Exposure for Cycling & Life

June 13, 2023 By Eric Lister

hill climb

The Ultimate Hill Climb Training Guide

May 31, 2023 By Eric Lister

shoulder pain cycling

How to Treat & Avoid Shoulder Pain While Cycling

April 12, 2023 By Eric Lister

psoas stretch

The Importance of the Psoas Stretch for Cyclists

April 6, 2023 By Eric Lister

cycling neck pain

The Ultimate Guide to Cycling Neck Pain: Causes and Solutions

March 21, 2023 By Eric Lister

Useful Info

  • Contact
  • Finally, A Global Cycling Club That Is Focused On Community And Love Of Cycling!
  • Privacy Policy
  • Share Your Story!
  • Terms And Conditions Of Use
  • Welcome to I Love Bicycling
  • What Happened When I Stretched Every Day For a Month

Recent Posts

  • JOIN Cycling: A New Training Platform for Cyclists
  • How to Hang Bikes in Your Garage: 4 Inexpensive Options
  • Gravel Bike Vs. Road Bike: Which One Is Better For You?
  • The 6 Types of Mountain Bikes & How to Choose the Best One for You
  • What Is a Touring Bike Good For? 5 Benefits We Know You’ll Love

Search I Love Bicycling

Connect with Us

  • Facebook
  • RSS
  • Tumblr
  • Twitter

Copyright © 2025 · Magazine Pro Theme on Genesis Framework · WordPress · Log in