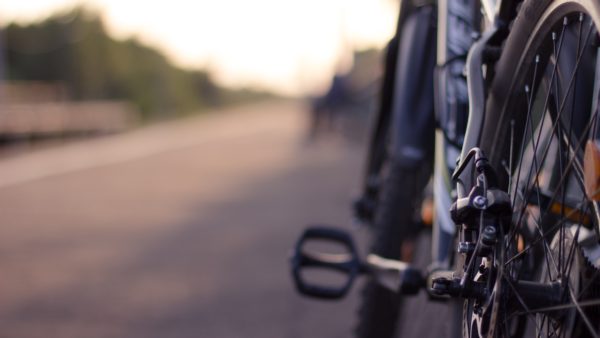
Changing the pedals on your bike can be a lot trickier than you may think. I’ll admit, I still get confused every time with the unusual pedal threading. That being said, there’s no need to take your bike into a mechanic every time you want to switch over your bike pedal.
Whether you’re travelling with your bike and need to dismantle it, or you’ve invested in some new pedals, armed with the proper tools and instruction you can have them switched over in no time.
What You’ll Need
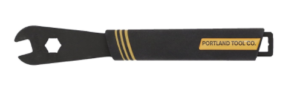
- Pedal wrench – A pedal wrench has a long handle, and is much thinner than a regular wrench. You may also be able to use a regular 15mm wrench for some pedals, but a specific pedal wrench does make the job a whole lot easier.
- Waterproof bike grease – Before putting pedals back on, you will want to put a thin layer of bike grease on the thread to keep them from tightening too much and seizing.
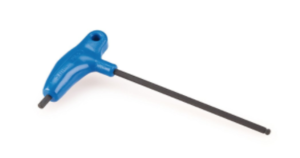
- Hex wrench – A 6-8mm hex (Allen) wrench is only necessary if your pedal does not have the flat surface on the axle.
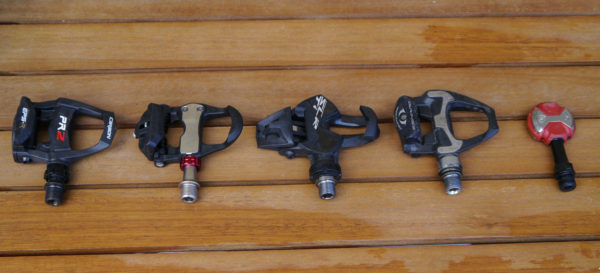
What type of pedals do you have?
Have a quick look at your pedal for flat spots on the axle, near the crank arm, that your pedal wrench can grab onto. If there are no flat spots on the bike pedal axle, then you will likely need to use a hex wrench inserted into the end of the pedal axle, on the inside of the crank arm.
Removing a Bike Pedal
Try to have your bike upright on the ground, rather than flipping it upside down. Make sure you have the chain on the largest chainring so if your hand slips you’re not hitting the sharp chainring.
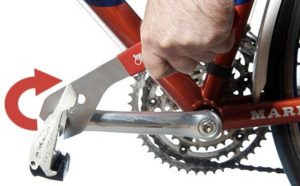
Removing the right pedal
The right pedal is like a traditional nut that you turn counterclockwise (lefty-loosey). Face the drivetrain side of the bike, rotating the crank arm to the 3 o’clock position. Place the pedal wrench on the flat spot between the pedal and the crank arm at the 9 o’clock position and push the wrench downward. Continue turning the wrench until the pedal is loose enough to turn the rest of the way with your fingers.
Removing the left pedal
The left pedal is the opposite of a tradition nut, loosening clockwise. Face the non-drive side of the bike and rotate the crank arm so it is at the 9 o’clock position. Place the pedal wrench on the flat spot between the pedal and the crank arm at the 3 o’clock position and push the wrench downward. Continue turning the wrench until the pedal is loose enough to turn the rest of the way with your fingers.
What to do if a bike pedal is stuck – If the pedal is old and rusted, or has been over-tightened, then you may need to apply a penetrating oil on the section attached to the crank arm. Wait for it to soak in, for most this is around 10 minutes, but you’ll want to check the manufacturer’s guidelines. If it is still not loosening at all, make sure you are turning the wrench the right direction!
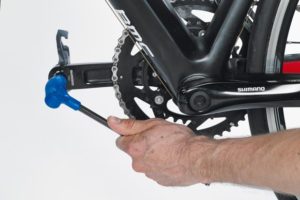
Removing pedals with a hex wrench
Removing pedals with a hex wrench is essentially the same process, but you will be fitting the end of the wrench into the back side of the pedal thread. The pedal thread direction is the same, but keep in mind the appearance of the wrench turning clockwise or counterclockwise can look different as you are seeing it from the inside of the pedal.
Installing New Pedals
Before installing new pedals, use a cloth to clean any dirt from both the crank and pedal threads. Apply a thin layer of grease to the pedal threads, as this will make the pedals easier to remove next time, and will keep them from seizing.
Look on the flat surface for a “L” for left and a “R” for right to see which pedal is which.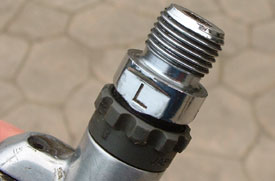 Begin threading the new pedals on with your fingers, making sure you’re turning the right way. If it’s resisting don’t force it, as the pedal should go on smoothly with very little resistance. Turn the right pedal clockwise to tighten, and the left counterclockwise.
Once you have it as tight as possible with your fingers, only then use your pedal or hex wrench.
You want the pedal to be tight, but you also want to be able to take it off again, so don’t tighten too much!