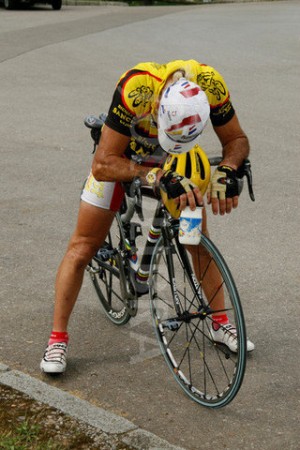
 How To Curb Tired Legs
We’ve all been on those group rides, where we became overzealous and thought we were speed bikers at the Kona World Championships. Then, spent the next few days paying the price, feeling like you were lugging around cement blocks; thinking, how can you rid yourself of these tired legs so you can hop back on for your next ride? Here are a few tips to speed up recovery after a tough ride.
Post-Ride Recovery Shake
It’s crucial to have a protein shake with some carbohydrates within 45 minutes of finishing your ride. Research has demonstrated that when combining carbohydrates with protein immediately after exercise it increases muscle synthesis. As we ride we break down muscle, and the body builds more muscle after activity as a process of adaptation to exercise. Forty-five minutes is the time frame when your muscles are most hungry for nutrition, and absorb readily to aid with muscle repair. In addition, it is a crucial period in restoring the glycogen (energy) stores we’ve depleted during our ride. It’s also been shown that endurance athletes rely on protein during long rides as a last fuel source once we’ve depleted our glycogen and fat stores. Recommended daily allowances of protein for males include 84-112 grams and 66-88 grams for females. Furthermore, some of my favourite mixes include soy milk with a scoop of vanilla, whey protein, mixed with some strawberries, and blueberries for the antioxidant effect. If I’m craving something sweeter, then I add a scoop of peanut butter along with protein powder, and some banana slices.
Stretch Before and Post Ride
Make sure you stretch your leg muscles in order to minimize the decreased range of motion due to sore muscles, which could lead to strains. Vital muscles to be stretched include quadriceps, hamstrings, calves, IT bands, hip flexors, and glute maximus. There are several stretching techniques one can use to achieve elasticity. The most commonly known is “static stretching”, which requires you to stay in a stationary position, and place the muscle in a stretch, typically in the opposite direction the muscle performs.
There is also “proprioceptive neuromuscular facilitation (PNF) stretching”, which involves stretching the muscles with alternating sets of static stretching versus muscle contraction; with this style you would need a partner to assist you. A PNF stretching example includes a static stretch of the hamstring for 10 seconds, and 10 seconds of contracting the hamstring by pushing against the person’s hands/body, with a stretch-contract-stretch sequence. The advantage of this stretching is you see immediate gains in flexibility, more so than in static stretching.
Another form is “dynamic stretching”, which involves a person performing low intensity exercises involving that muscle action; for instance, walking lunges to stretch the hip flexors. These are best completed before a ride in order to get the muscles firing and geared up for cycling. Each stretch should be completed 2-3 times, for no more than 30 seconds each. It’s more effective to stretch these muscles once you’ve completed a 10-15 minute warm up, as well as immediately post ride. Research has shown minimal elasticity gains when performing these stretches prior to a warm up. “I Love Bicycling” has an article on some great stretches for cyclists with photos included.
Hydration Post-Ride
After a ride, drink plenty of water mixed with a cap of Pedialyte, per 8 ounces. Pedialyte contains condensed electrolytes, and aids in speeding up muscle recovery by hydrating muscles, and flushing out lactic acid. By drinking plenty of fluids with electrolytes, it helps your body eliminate the lactic acid through urine. In addition, it helps in hydrating your body in preparation for your next ride. There are formulas online, which can be used to figure out how much water is needed for your particular body weight and activity level. One way to check if you’ve hydrated adequately is by observing the colour of your urine. If your urine is yellow you’re still in need of hydration, but once it comes out clear or a pale yellow you are hydrated.
Ice Bath
A great way athletes minimize soreness and achy joints is by making themselves an ice bath. The advantage of an ice bath is allowing several muscles and joints to be treated at the same time. It is also the one ice treatment that has the deepest penetration effect of tissues. This treatment can be done in the bathtub of your home. Fill up the tub until it passes your thighs and dump in 1.5-2 bags of ice. In order for it to be therapeutic the temperature should be between 50-60 degrees. Granted, you’ll be freezing for the first 5 minutes, but afterwards you’ll be numb. If you don’t have a bathtub this can also be done by purchasing a 10 gallon garbage tub, and completing the same process. The ice bath can be completed for a minimum of 20 minutes, but no longer than 30, because then it has the adverse effect. If done for more than 30 minutes the body begins to think it’s entering a hypothermic state, and starts to dilate the blood vessels in order to increase body temperature. This is the opposite effect of the ice, which is intended to constrict blood vessels in order to decrease swelling and eliminate pain.
In following these four tips, it’ll help you avoid delayed onset muscle soreness (DOMS), which happens when you’ve pushed your body a bit too far. By speeding up recovery, we can gear ourselves up for our next ride, where this time we can imagine ourselves to be as fearless as Sebastian Kienle going into a headwind.