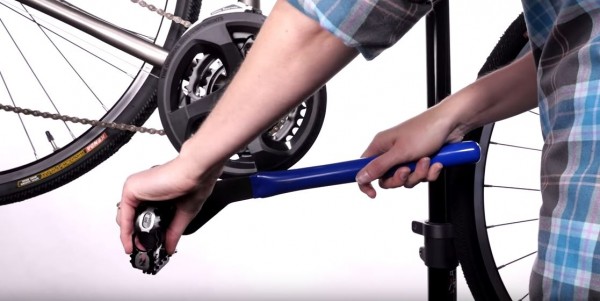
Installing pedals is easy if you know what to do. Pedal design has come a long way in the past few years but the basics of design remain the same. Know which side is which and what tools to use and you’ll be good to roll in no time.
Greasing Before Installing Pedals
The big thing to do before installing pedals is to make sure both the threads of the crank arm and of the pedal itself are clean. You don’t want any excessive dirt or crude in the threads. A simple wipe with a rag will do the trick. After you’re sure the threads of both are clean, take a dab of grease and put it on the threads of each pedal all the way around. You don’t need a lot but just enough. This will help ensure that the pedals don’t become stuck in the crank arm for when you remove them down the line.
Left Means Counterclockwise
On bicycles, left-hand threads are used in three places, on left pedals, right bottom brackets, bearing cups, and freewheel cones. If these parts were not reverse or left-threaded, pedaling would cause the parts to loosen and come off during a ride. Installing pedals is one of the most perplexing of all bike issues for beginners because of the left-hand thread on the left pedal.
Right is Right, Left is Wrong
Many cyclist subscribe to a figure of speech, a mantra that keeps the pedal threads straight. Repeat this to yourself when installing pedals and you can’t go wrong. “Right is right — Left is wrong.” It means the threads on the right pedal turn clockwise to tighten like any other bolt as you look at it from the side of the bike. The threads on the left pedal are wrong, meaning that they turn counterclockwise to tighten. Another way of thinking about it is that you turn the pedals toward the front of the bike on both the left and right side to tighten.
Tools for Installing Pedals
It’s best to use a pedal wrench, which is a longer version of a normal open-end wrench, when removing pedals, but any 15 mm wrench that fits will suffice to remove a pedal. The problem is, most are too thick, and shorter than a pedal wrench. With some pedals you may need an hex key that loosens and tightens from the back side of the crank arm. They typically require a 6-mm hex wrench for some Look Pedals or an 8-mm hex wrench, sometimes referred to as an allen wrench.
Installing Pedals Finger Tight
Begin threading your pedals back on with your fingers only. Cross-threading is a bane on pedals, and a common pitfall for beginners. If the pedal resists, don’t force it. They should screw on clean and smooth with little or no resistance. Again, twist the drive side — right side — pedal clockwise to tighten. Twist the non-drive side pedal, the left side — counterclockwise to tighten. Make sure they are straight and exactly perpendicular to the crank arm. Finish tightening the pedals with the pedal wrench or hex tool. Always be sure to double check that the pedals are tight. They should be firmly snug but don’t have to be herculean tight. Losing a pedal is a recipe for crashing and a loose pedal can damage your crank arm threads beyond repair.
Installing pedals is easy when you know what to do. Removing pedals can be a bit more of a challenge but this article should help you. The big thing when installing pedals is just to make sure that you don’t cross-thread them. This can be a pain to fix but other than that, it’s easy and you’ll be riding before you know it.
