It’s 5am and off goes your motivational, cycling alarm. My personal favorite is MACCA’s “Embrace the Suck” slogan. Sluggishly you get up from bed and gear up for your morning spin. Then, the moment you get on your saddle you question why you were so reluctant getting out of bed in the first place. After a nice warmup, you really start to crank it, and climb at speed when suddenly you feel that nagging pain on the outside of your knee again. It’s been creeping up for a few weeks now, and although you stretch your legs, you can’t seem to pinpoint the cause.
This, my cycling community, is known as the annoying “IT band syndrome” a common injury plaguing cyclists. If not recognized in time and treated appropriately it could really put a damper on those rides and even force you to stop altogether.
Here are 7 exercises you can do to prevent issues with your IT band, which usually occur due to lack of proper stretching and gluteus maximus (aka butt) weakness. One essential tool for any cyclist, besides flashy cycling kits is a foam roller, preferably one with ridges, which can be found at any local sporting goods store or amazon.com here.
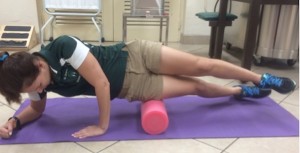
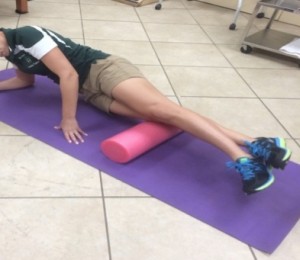
Exercise 1: IT Band Foam Rolls
It’s vital that cyclists roll out their IT bands immediately after their rides to release them. Hip abductor muscles such as the tensor fascia latae which tapers into the IT band, and glute medius are used frequently during cycling causing them to tighten. Proper execution of this exercise requires you to lie on your side and foam roll past your knee and hip, bilaterally. As I always tell my athletes, “if you’re not in pain, you’re not rolling it out correctly.” It hurts, but I promise you’ll feel a decrease in pain and looser afterwards.
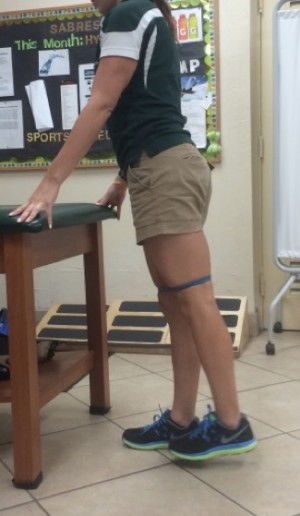
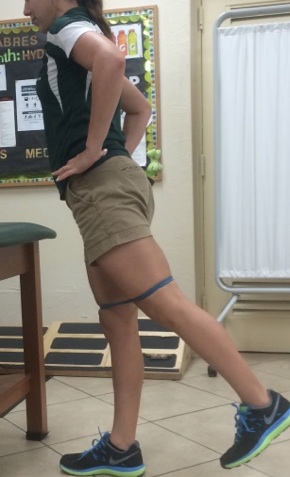
Exercise 2: Glute Max Extensions
Strengthening your Glute max is vital in order to avoid compensation patterns, which can lead to IT band syndrome. The Glute Max can be strengthened with the standing hip extension exercise, making sure you don’t throw your hips back as you complete the motion. Complete 3 sets of 12-15 repetitions on both legs.
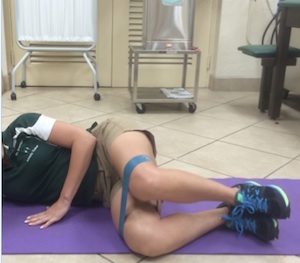
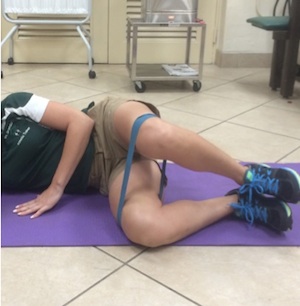
Exercise 3: Clamshells
‘Clamshells’ require you to wrap a theraband loop around the top of your knees, and move your legs apart as your heels are kept together. As this exercise becomes easier, you can increase resistance with a thicker theraband loop. They typically range from least resistance to most resistance in a colour coded progressive system of yellow, green, red, blue, black, and grey in that respective order. Complete 3 sets of 10 repetitions.
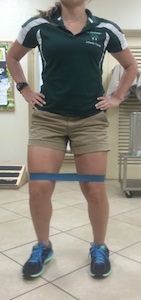
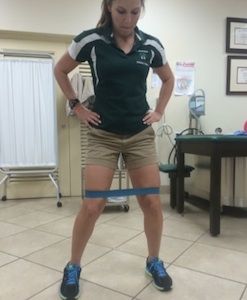
Exercise 4: Side-walks
Keeping the theraband loop in the same position (looped around both legs, above the knee), you can stand up, and complete side-walks with a slight bend in the knee in order to eliminate any assistance from your calves. You’ll want to complete these along a long stretch, which includes 20 or more steps, going left and right. You should feel the soreness on the outside hip over your glute medius and tensor fascia latae. Remember to make sure your toes are always pointing forward and not rotated in order to prevent assistance from other muscles. Complete 3 sets, moving a minimum of 20 steps to the right and then 20 to the left.
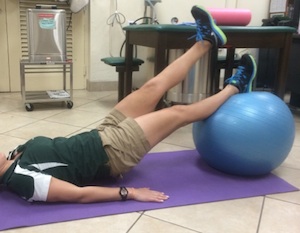
Exercise 5: 1 Leg Glute Max Bridges
Using a large medicine ball, lie on the floor with both legs fully extended, 1 leg with the heel of your foot on the ball, and the other leg in the air. Tighten your core, and glute max muscles, dig your heel into the medicine ball, and come up off the floor. Complete 3 sets of 12-15 repetitions with each leg.
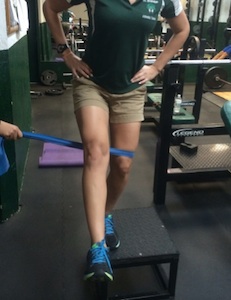
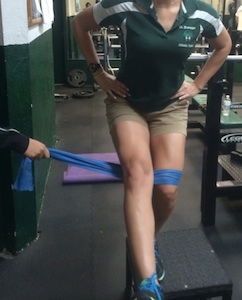
Exercise 6: 1 legged Squats
This exercise requires an elevated step box placed near a pole or anchor of somesort; you can also complete this exercise with the help of a partner. You must use a larger theraband loop, which has some extension, and place it around the knee of the leg you are strengthening. Once in place you can tie the band to the pole, or have your partner hold the other end. In this position you will perform 1-legged squats on the step box as you keep your hips back, keep your back straight, and make sure your knee does not go past your toes. The non-weight bearing leg should be extended out in front of you in the air. You should feel the soreness in your glute max, if you don’t, push your hips back a bit more. Complete 3 sets of 10-12 repetitions on each leg.
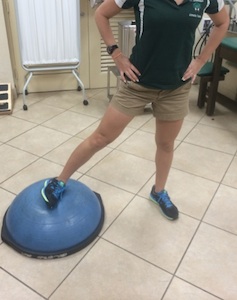
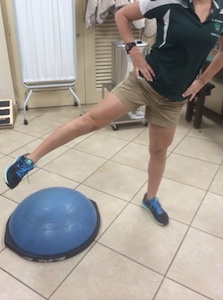
Exercise 7: Hip Abduction
Using a bosu ball/half medicine ball, place the side of the foot of your moving leg on the top of the bosu ball. Keep your stationary leg slightly bent on the floor. Then, keeping your foot in the same position, extend it sideways, as seen in the photo, making sure you don’t jerk your body to the side to compensate for weakness. A good way to prevent this is by keeping your hands on your hips, and this will serve as a guide for you. Complete 3 sets of 10 repetitions on each leg.
As we get more dedicated to cycling, and start logging in those miles, it’s essential to be proactive with your injury prevention tactics and listen to your body. By completing these 7 exercises, 3 times a week with a day of rest in between, you can avoid one of the most nagging injuries experienced by many cyclists. In following this program, you’ll be one step closer to becoming a stronger cyclist.
IT Band Program for Cyclists
Looking for a program that will help you address the muscle imbalance that is likely causing your knee pain? Dynamic Cyclist is an online training platform designed to help cyclists become stronger and faster while riding pain free for years to come. Complete your regimen with an all-inclusive program that addresses mobility, flexibility, strength and injury prevention, all for a fraction of the cost of one physiotherapy appointment. Try out their 7-Day IT Band Program and experience the results for yourself. Click here to try 7 days free!